Working on these Arduino projects has left me wanting/needing a bench power supply, but I'm finding those things to be fairly pricey. Watching YouTube one day, I ran across a bunch of people that were hacking apart old ATX power supplies salvaged from discarded PCs, and breaking out the various voltages that are produced. “Brilliant!” I thought to myself. I've got three of them under my desk right now, all of which probably still work, and are capable of giving me 12v, 5v and 3.3v on the cheap. Perfect for what I am doing. The only drawback I could see is that a.) opening up a power supply and hacking up the wires inside is probably not the safest thing in the world, and b.) I'd hate to go through all that work, only to have the power supply crap out on me a couple of months down the road. That's when I started thinking outside the box. Well, outside the power supply anyway, and into a different box: A breakout box.
For step one, I scrounged up an old motherboard with a 24-pin ATX connector and desoldered it. All the extra power supplies I have kicking around are 20-pin, but I wanted to have the flexibility of using either. Here I’m testing using a red LED and a 220-ohm resistor on the 5VSB pin, a green LED and a 220-ohm resistor on one of the 5VDC pins, and I’m shorting across PS_ON and one of the COM pins:

As I had hoped, the red LED is lit whenever the power supply is connected to AC power by virtue of being connected to the standby pin, and the green LED lights up as soon as the power supply turns on when PS_ON is shorted to ground. Sweet!
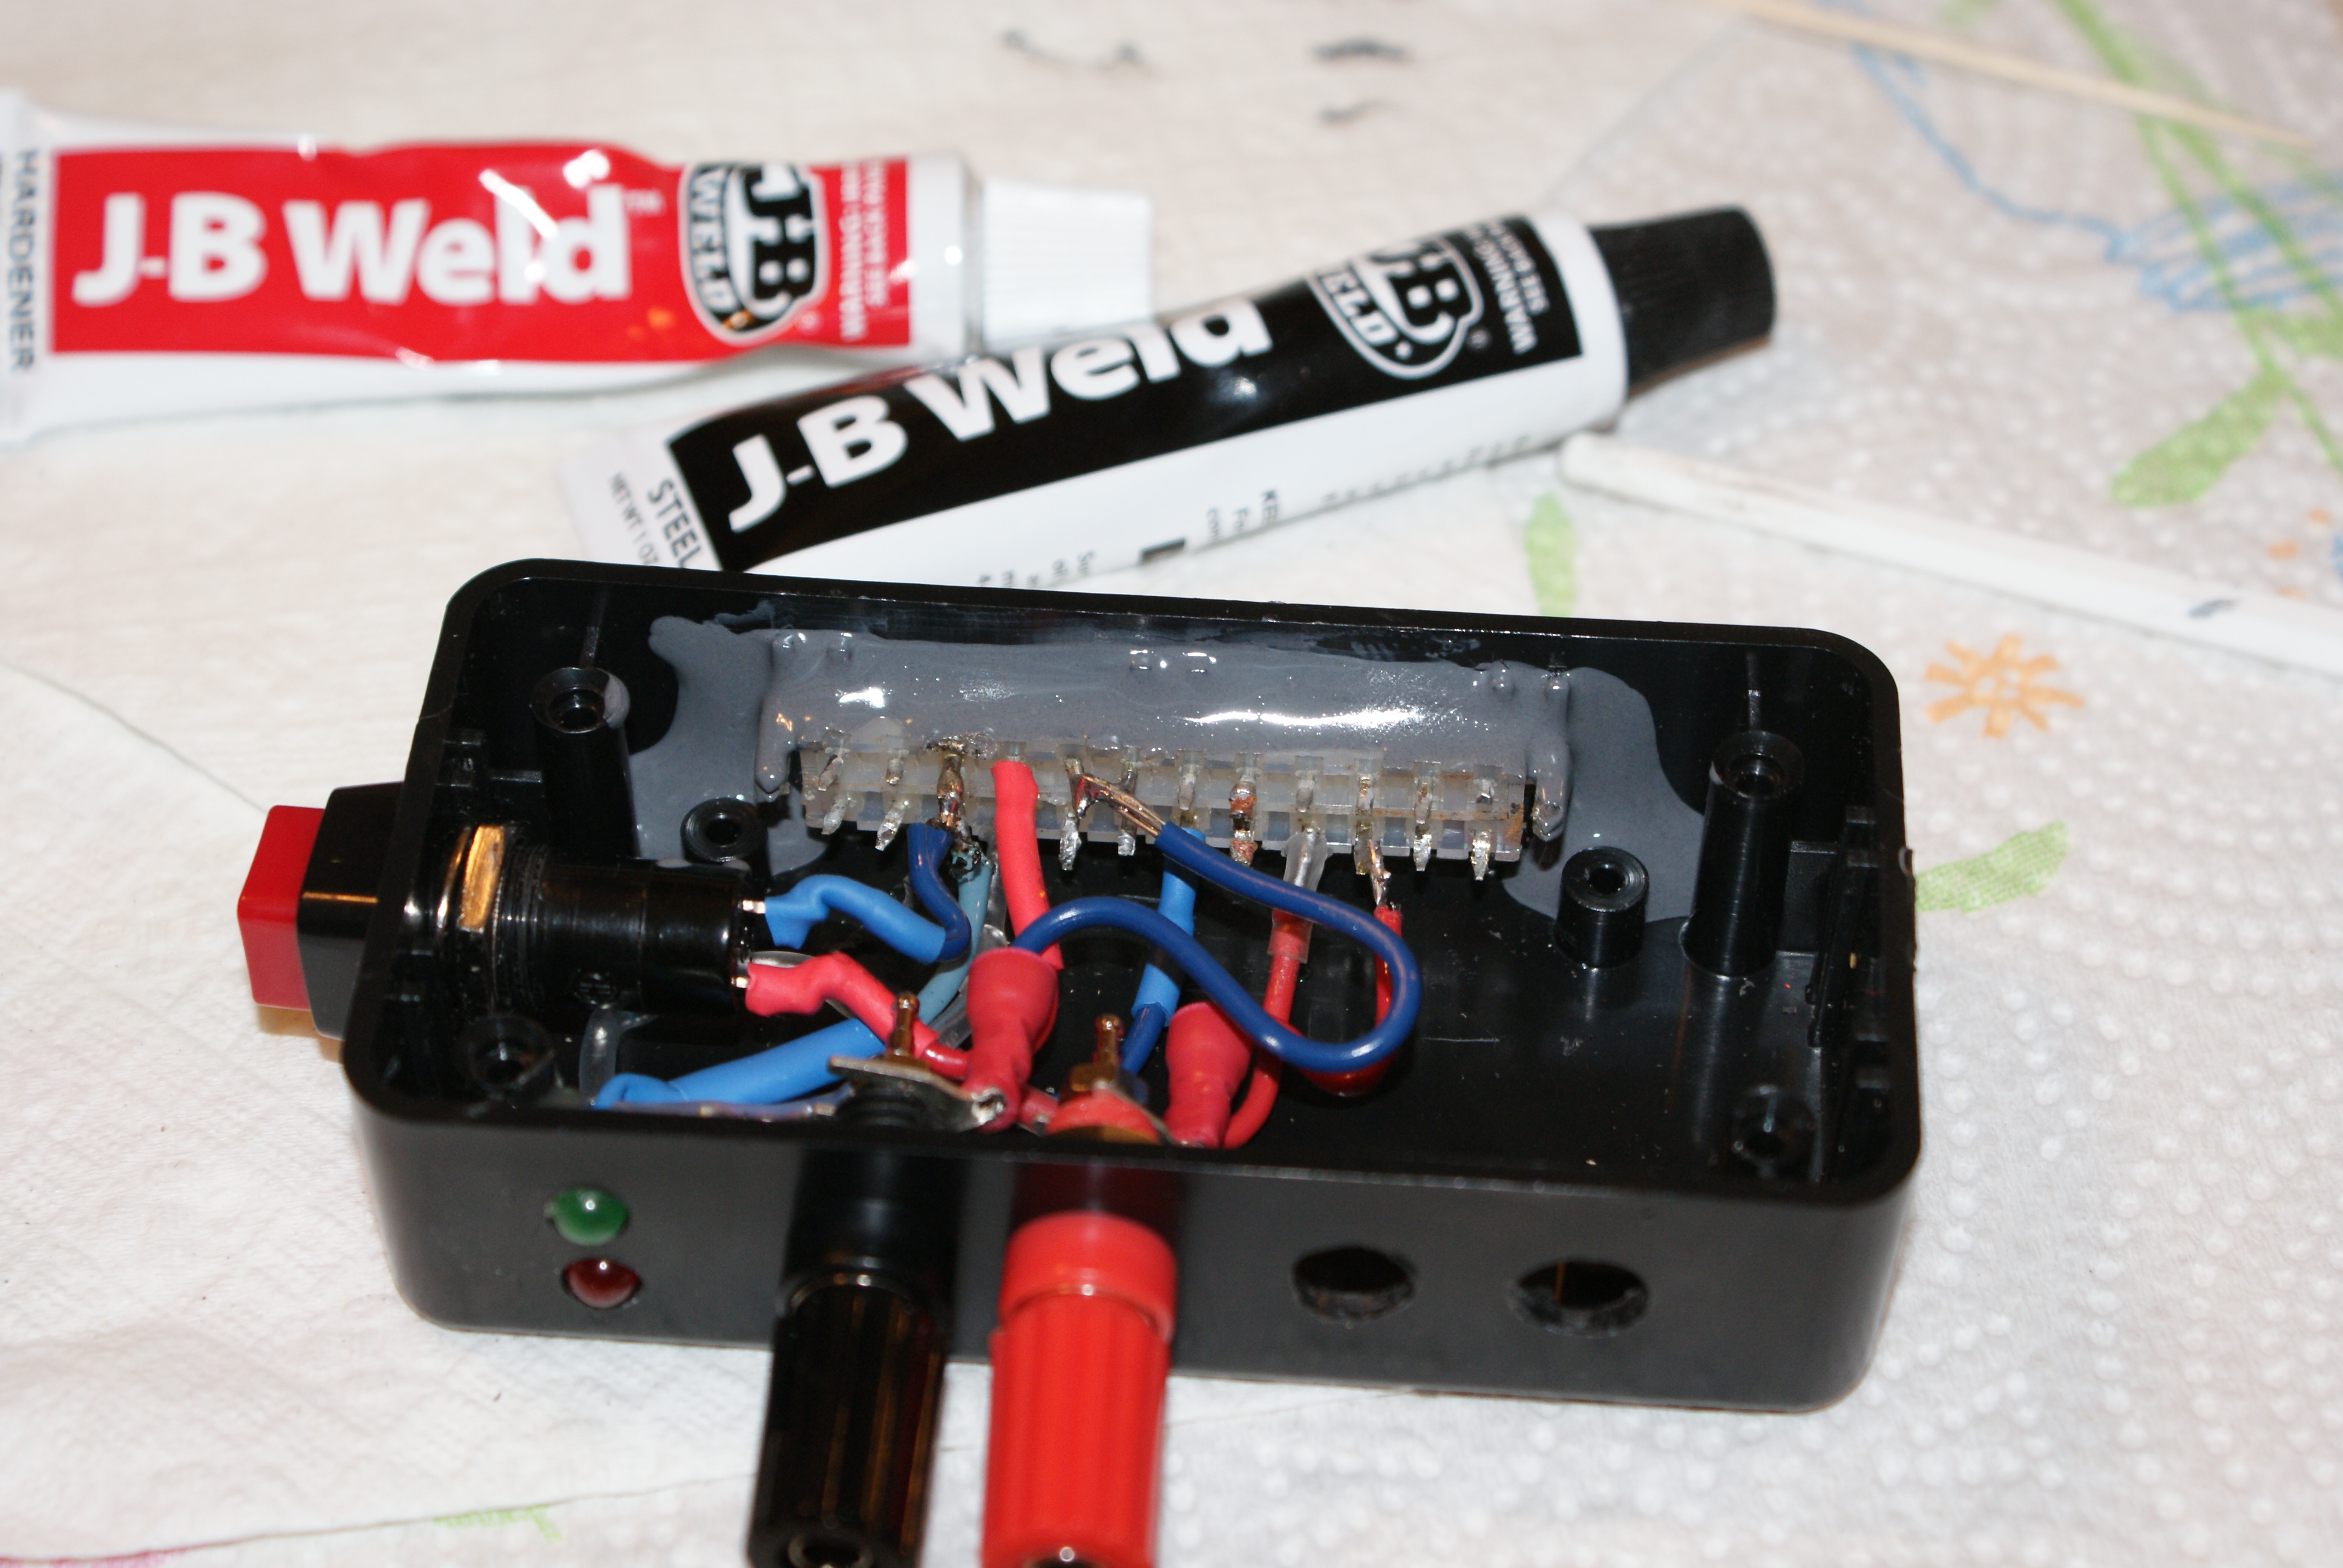
Next I soldered the resistors to the LED anodes and protected them with some heatshrink tubing. Here I’ve got them soldered to the appropriate pins on the ATX connector, and hot glued into place in the project box (the power switch is mounted, but not yet connected):

Next I connected the switch and binding posts up to the appropriate pins. For now I am only hooking up the 12v (because the place I got the binding posts at only had two, pfft), but I went ahead and drilled holes in the project box for the 5v and 3.3v posts. I was not sure how I was going to secure the ATX connector, since it really didn’t have any decent mounting points. I racked my brain for a bit, and decided on JB Weld. After all, a farmer in Kansas fixed the engine block on his tractor with it, right? Sadly, that story is no longer on the packaging. They should totally bring that back. But I digress, here’s the JB Weld, slopped in there good:
I let that cure overnight, then plugged in the power supply and gave it a test:
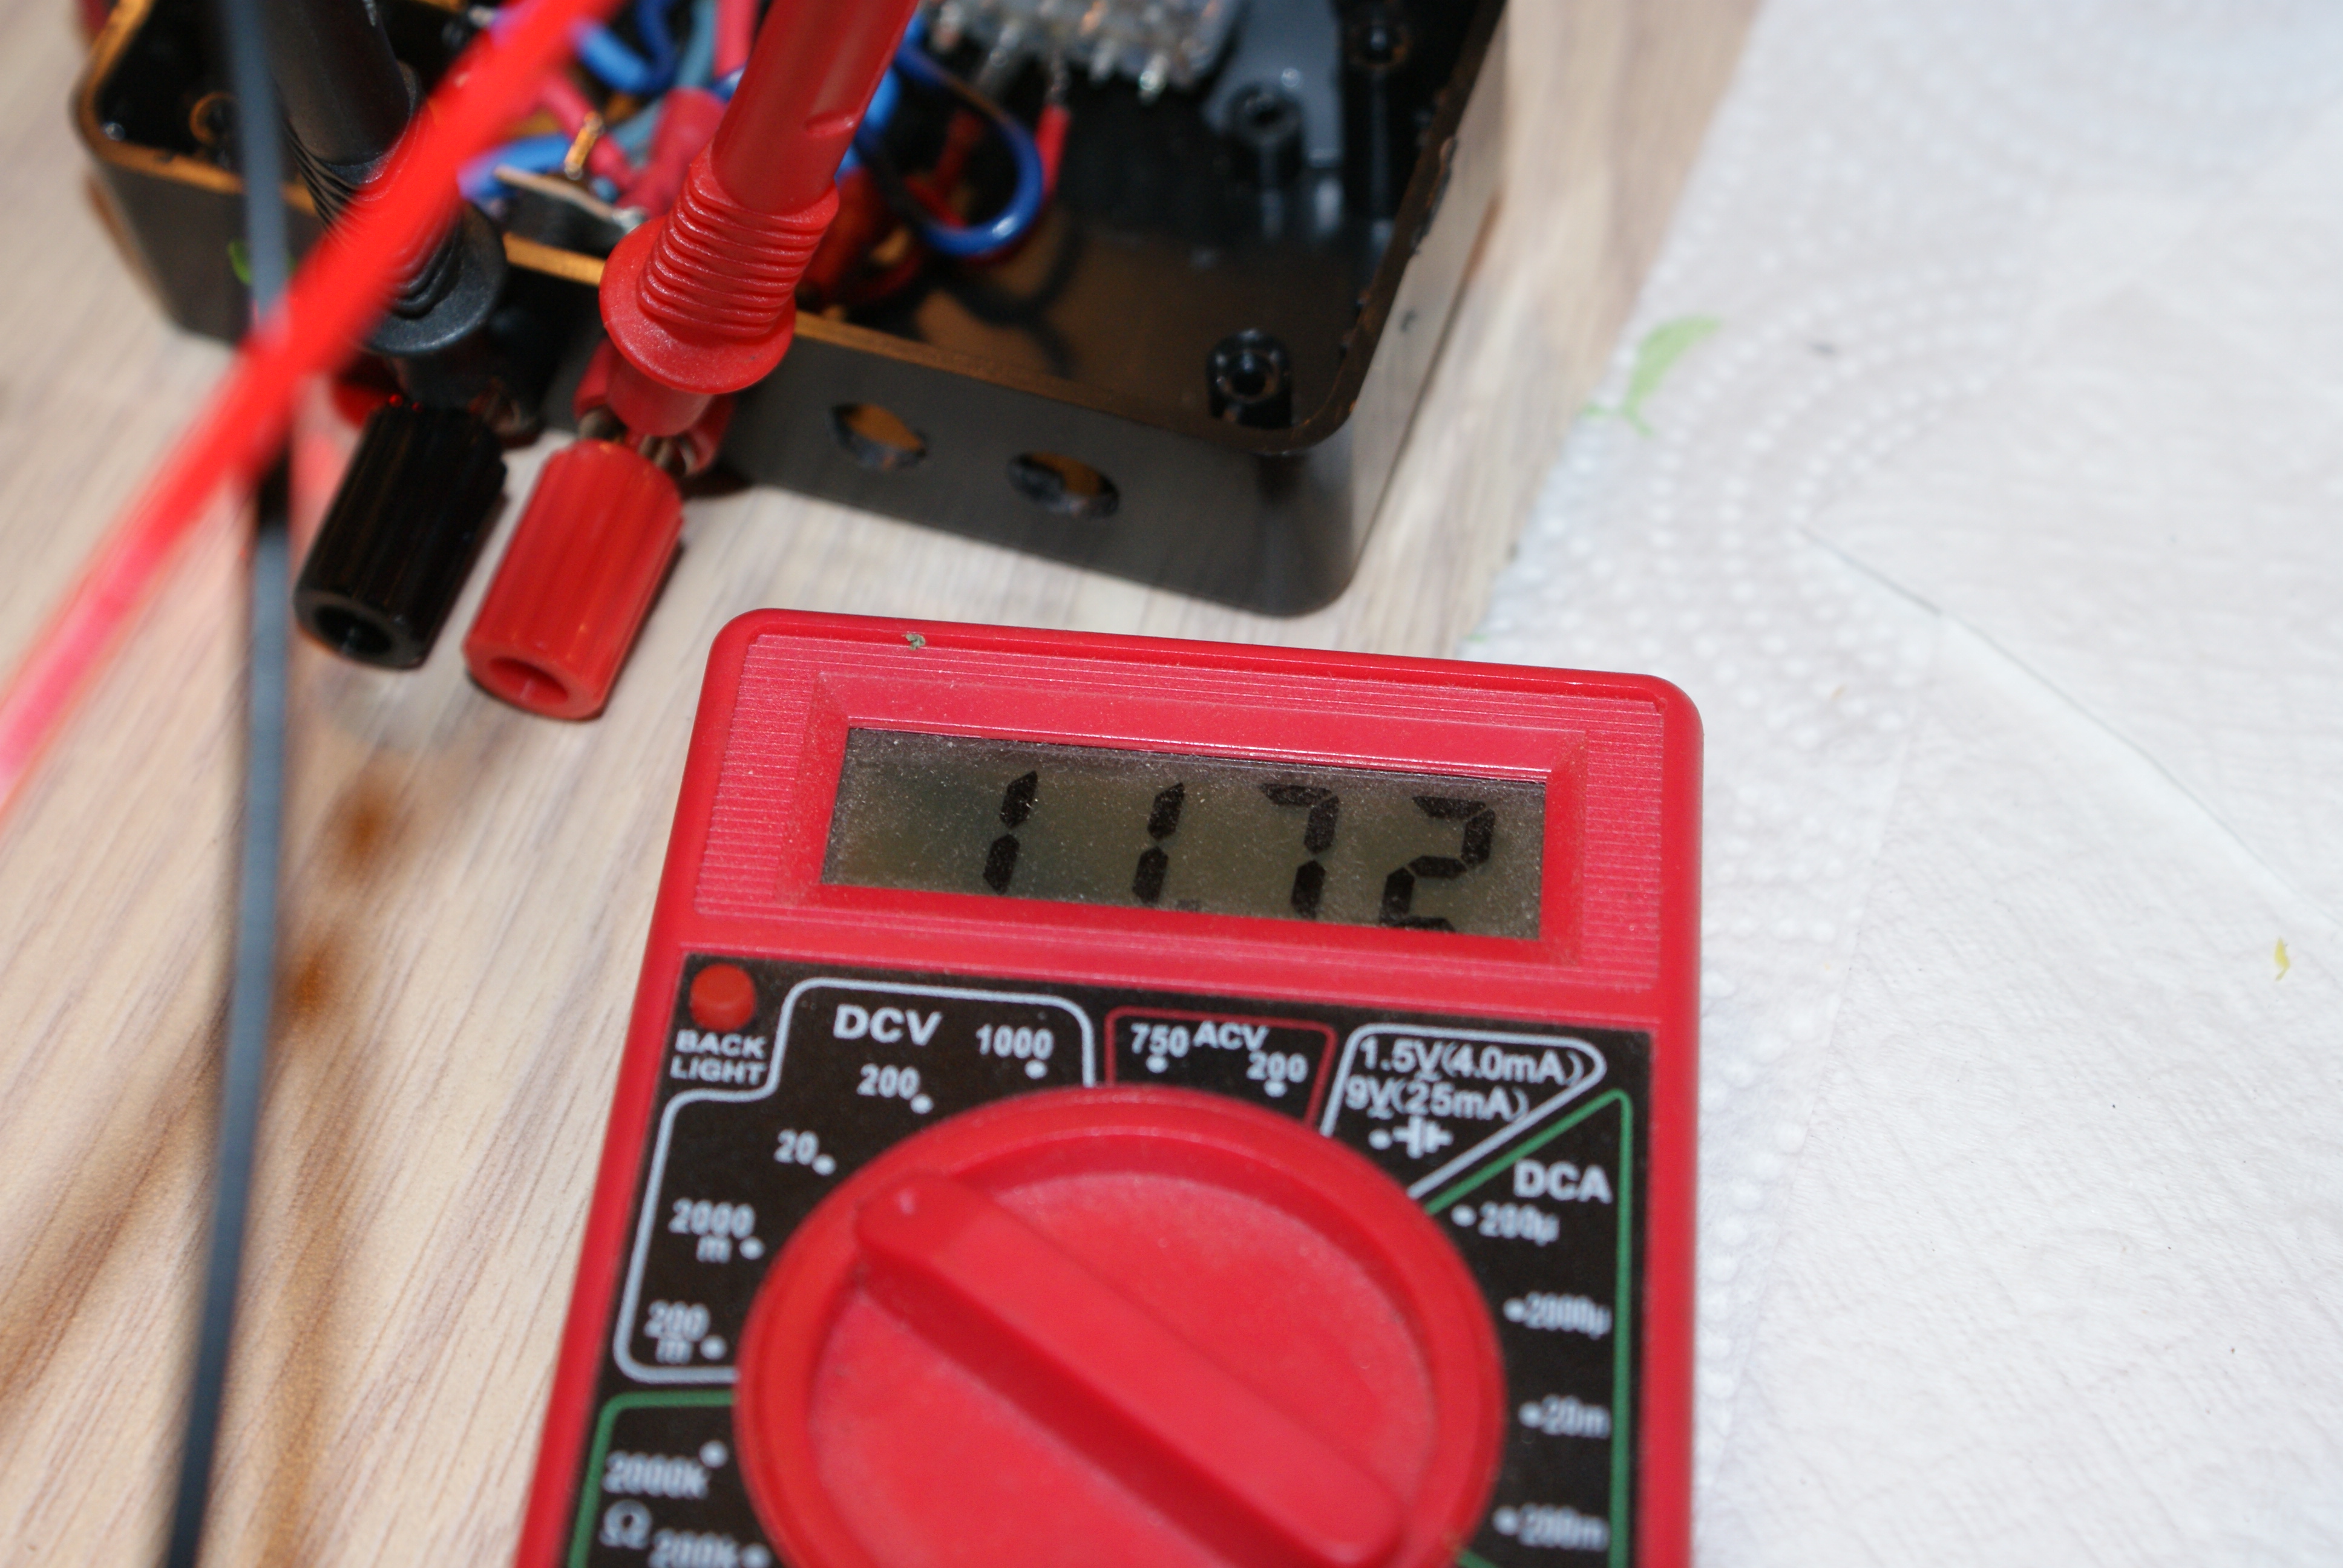
Ehh, close enough for Government work. (An uncle of mine defines that standard thusly: Measure it with a micrometer, mark it with chalk, cut it with an axe.)
Here we are with the box closed up and a couple of labels affixed for reference:
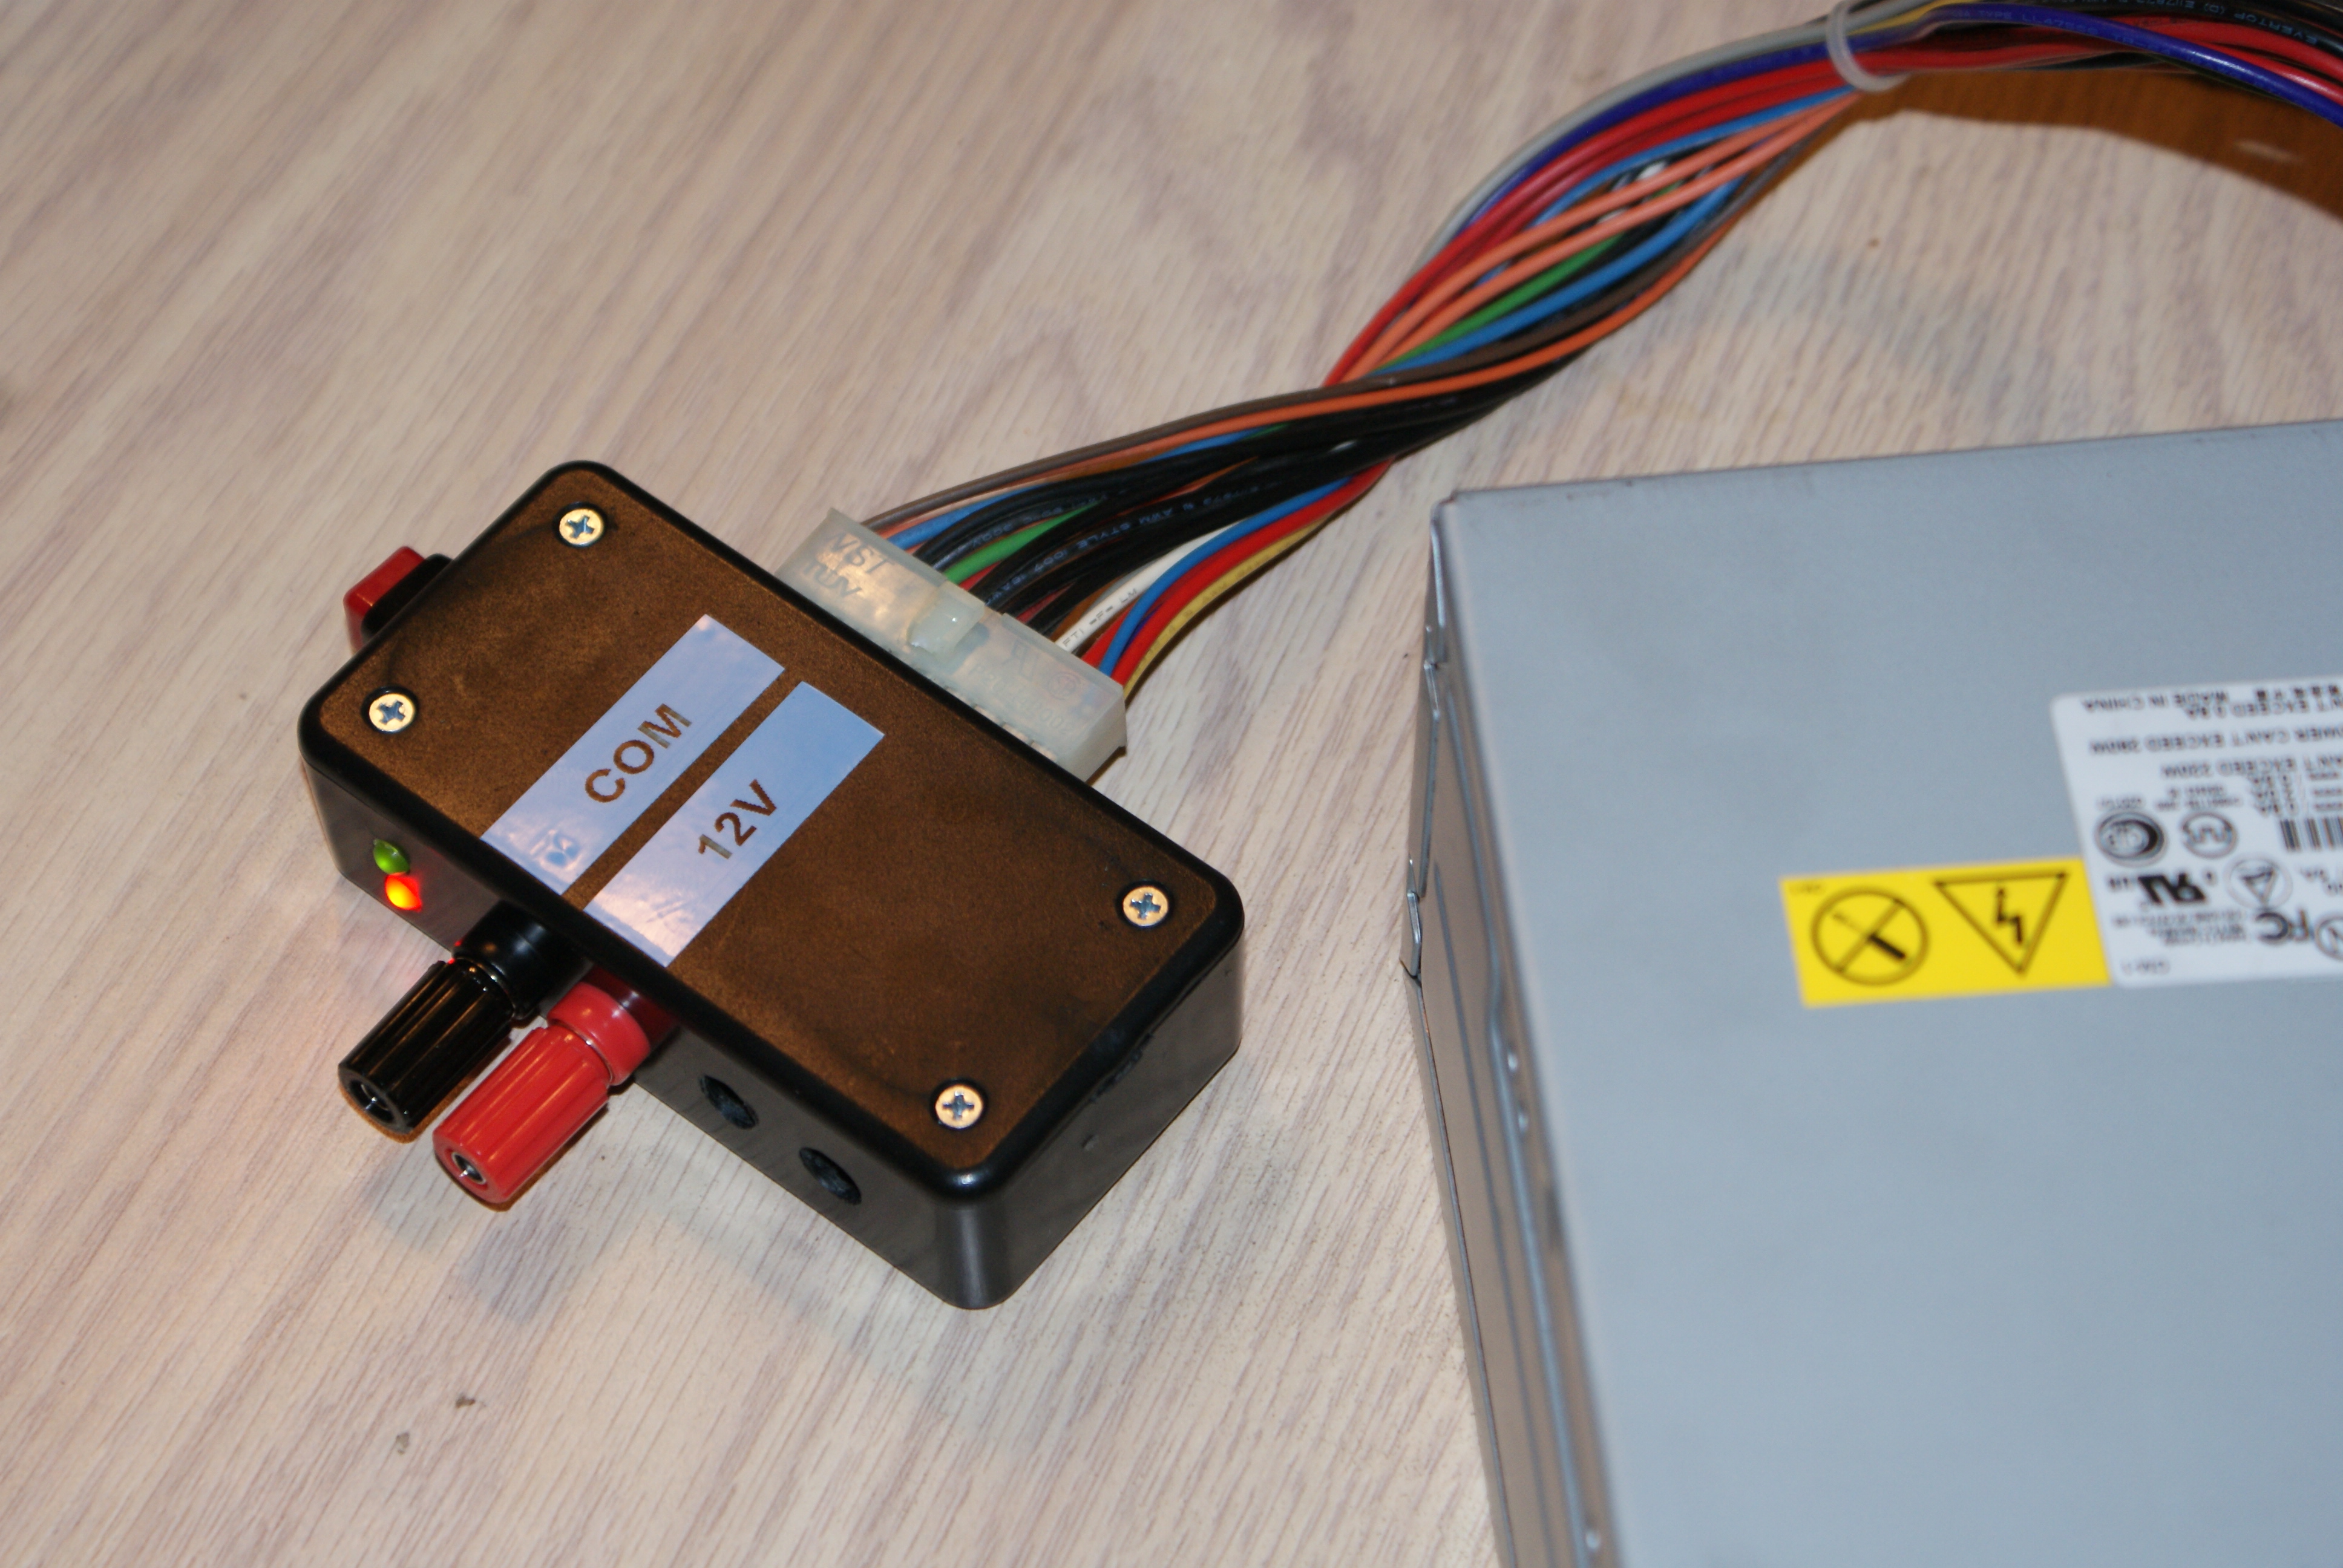
Much safer to use, and if the power supply happens to give out, I can swap it out in seconds. I like it. Now off to find a couple more red binding posts.